
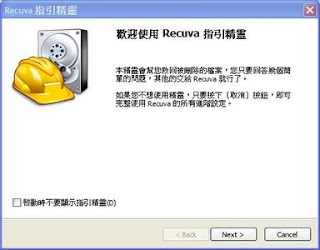
1. 啟動Recuva。就會出現引導精靈。
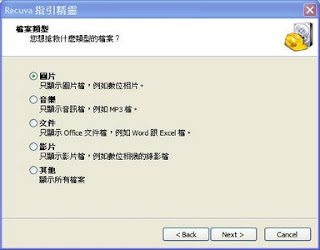
2. 點按『Next下一步』,就會詢問你要搶救什么類型的檔案?
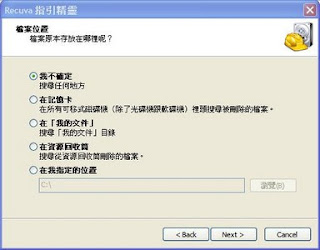
3. 選擇了檔案類型后,點按『Next下一步』,接下來就要確定搜尋的位置。
4. 點按『Next下一步』后,會問你要不要『啟用深層掃描』?
通常都直接點按『開始』,除非你之前已經掃描過一次而沒有找到你要的檔案。
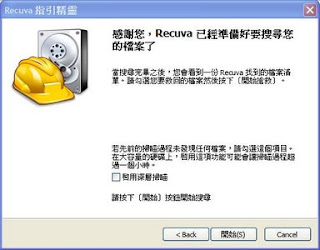
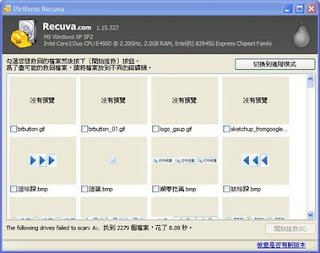
5. 掃描過后,將會出現以下的畫面。
上一篇:Recuva的使用教學-安裝篇(1)
下一篇:Recuva的使用教學-救回與刪除檔案(3)

2. 點按『Next下一步』,就會詢問你要搶救什么類型的檔案?

3. 選擇了檔案類型后,點按『Next下一步』,接下來就要確定搜尋的位置。

4. 點按『Next下一步』后,會問你要不要『啟用深層掃描』?
通常都直接點按『開始』,除非你之前已經掃描過一次而沒有找到你要的檔案。

5. 掃描過后,將會出現以下的畫面。

上一篇:Recuva的使用教學-安裝篇(1)
下一篇:Recuva的使用教學-救回與刪除檔案(3)

0 意見:
張貼留言