
你是否有一些文件想隱藏起來不被外人看到呢?
有了 My Lockbox 就可以輕易的辦到了。
1. 首先去 Freewarehouse 下載 My Lockbox。
2. 啟動安裝程式。

3. 當你看到上圖的畫面時, 你就要設定你的密碼了,在『Enter your password』處輸入你的密碼,『Confirm your password』處再一次輸入以確定你的密碼。『Enter a password hint(will be display in the password prompt box)』是讓你輸入密碼的提示,以便你容易記住你的密碼。通常這里都是騰空。這個密碼非常的重要,若是忘記了,你就永遠打不開你的文件夾了。

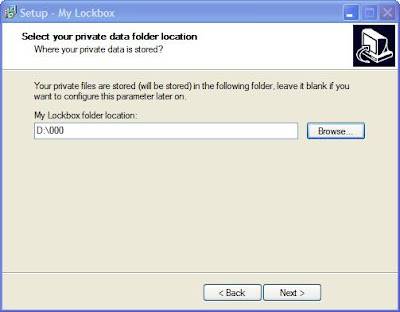
3. 密碼輸入完后,按『Next』就會看到上圖,在此你就要選擇你要隱藏的文件夾(當然你也可以先騰空,待以后再設定)。
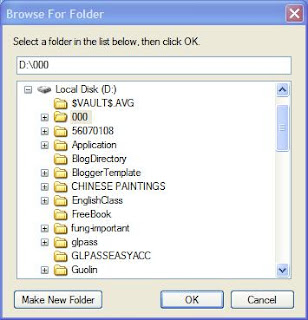
4. 按『Browse』后,就可依照以上的畫面來選擇你的文件夾。選定后按『OK』
5. 確定你的選擇后, 按『Next』

5. 棄選『Open release notes』, 按『Next』
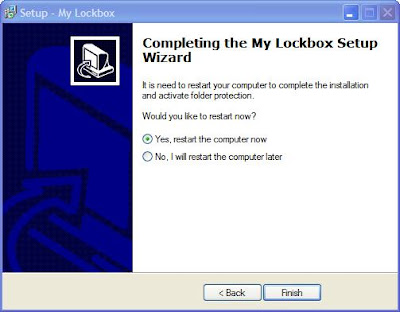
6. 按『Finish』重新啟動windows。安裝完成。
下一篇: My Lockbox 的使用教學 - 設定篇(2)
相關文章:
有了 My Lockbox 就可以輕易的辦到了。
1. 首先去 Freewarehouse 下載 My Lockbox。

2. 啟動安裝程式。

3. 當你看到上圖的畫面時, 你就要設定你的密碼了,在『Enter your password』處輸入你的密碼,『Confirm your password』處再一次輸入以確定你的密碼。『Enter a password hint(will be display in the password prompt box)』是讓你輸入密碼的提示,以便你容易記住你的密碼。通常這里都是騰空。這個密碼非常的重要,若是忘記了,你就永遠打不開你的文件夾了。

3. 密碼輸入完后,按『Next』就會看到上圖,在此你就要選擇你要隱藏的文件夾(當然你也可以先騰空,待以后再設定)。

4. 按『Browse』后,就可依照以上的畫面來選擇你的文件夾。選定后按『OK』

5. 確定你的選擇后, 按『Next』

5. 棄選『Open release notes』, 按『Next』

6. 按『Finish』重新啟動windows。安裝完成。
下一篇: My Lockbox 的使用教學 - 設定篇(2)
相關文章:

0 意見:
張貼留言